Stash Changes
Stashing lets you temporarily set aside uncommitted changes so you can work on something else and come back to your changes later. It is useful when you need to switch context quickly without creating a work-in-progress commit.
See also Git Stash in Git documentation.
Creating a Stash
To stash your current changes:
- Open the Working Copy page.
- Open working copy menu and choose Stash ....
- Optionally enter a description for the stash in the dialog that appears.
- Click OK.
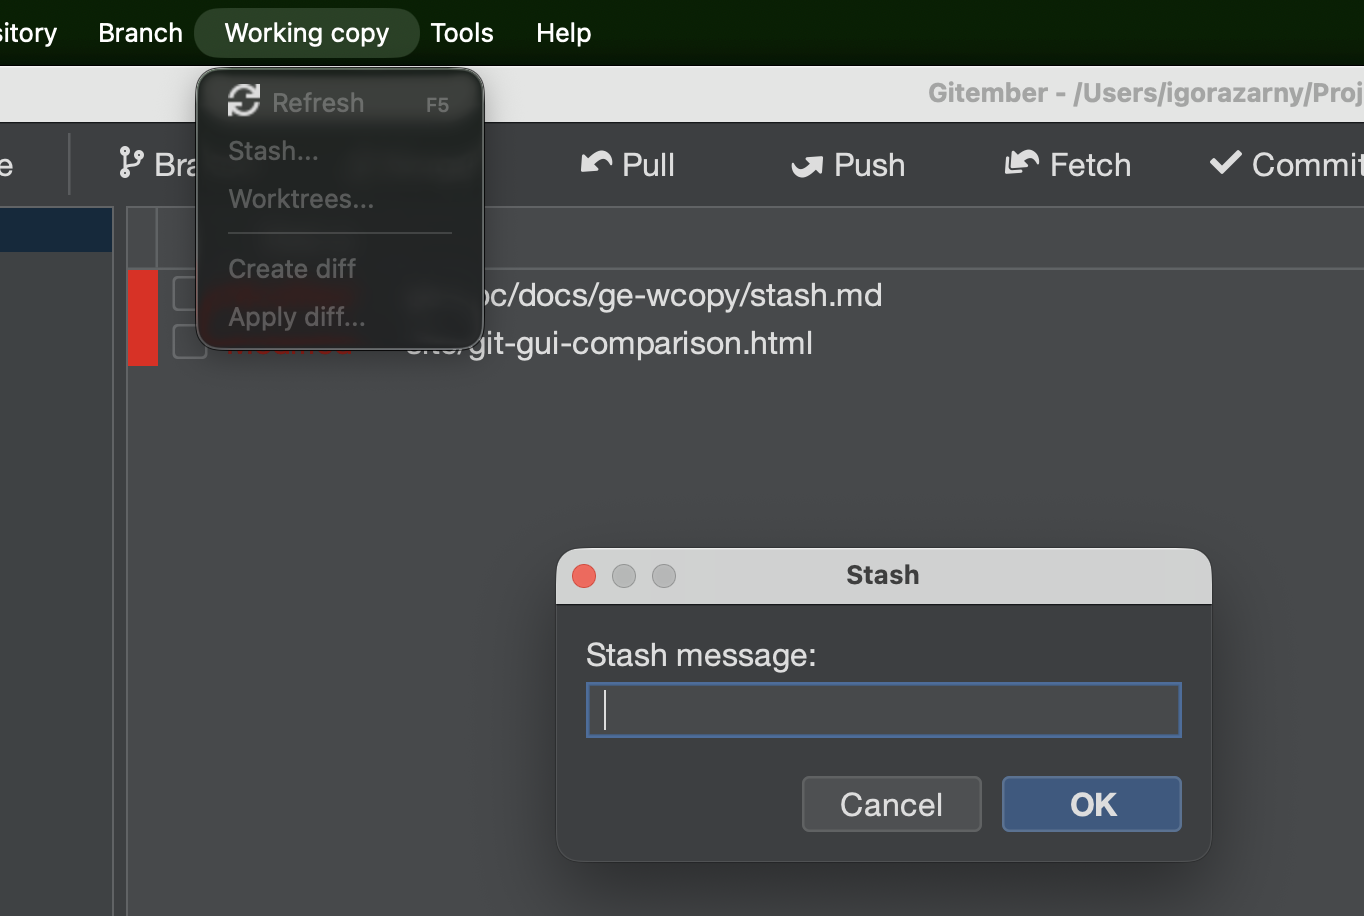
Your working directory is restored to the last committed state, and all staged and unstaged tracked changes are saved.
Give each stash a meaningful description so you can identify it in the stash list later.
Viewing the Stash List
To see all saved stashes:
Expand the Stashes section
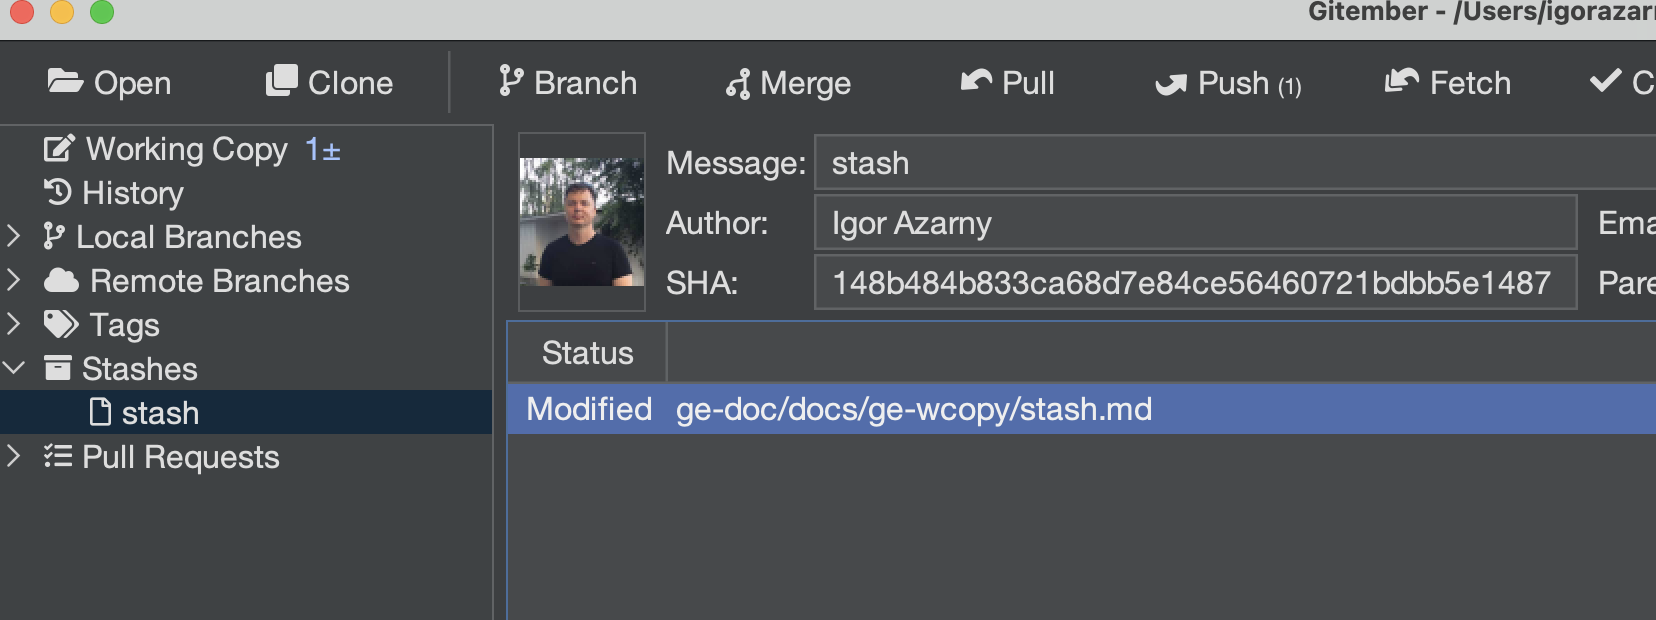
Each stash entry shows:
| Column | Description |
|---|---|
| Description | The message provided when the stash was created, or the default auto-generated message. |
| Date | When the stash was saved. |
Applying a Stash
To restore stashed changes back to the working directory:
- Right-click the desired stash entry and select Apply Stash.
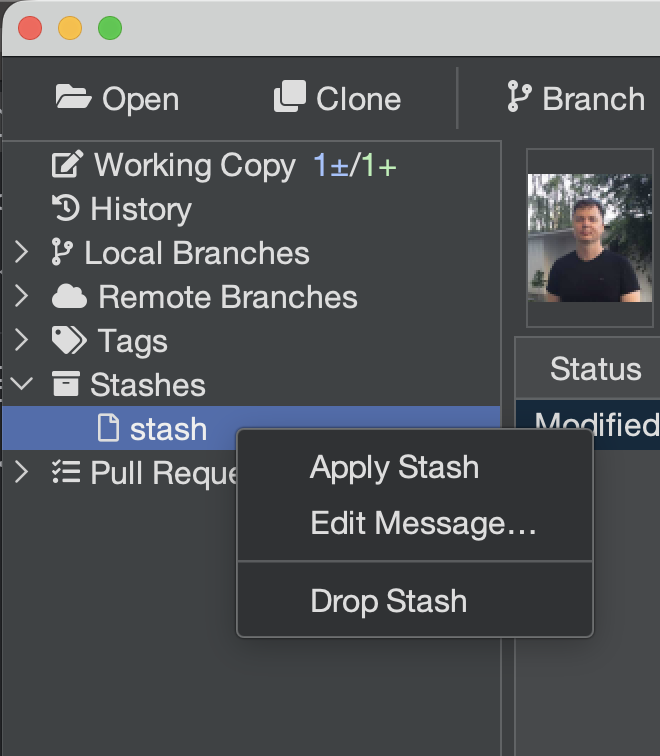
Gitember applies the stash without removing it from the stash list, so it remains available if needed again.
If the applied stash conflicts with the current working tree, conflicts will be marked in the Working Copy file list just like merge conflicts.
Dropping a Stash
To permanently remove a stash entry:
- Right-click the stash entry.
- Select Delete Stash.
The entry is removed from the stash list. This operation cannot be undone.
Summary
| Action | How to trigger |
|---|---|
| Save changes to stash | Working Copy → context menu → Stash Changes |
| View all stashes | Branches panel → Stashes section |
| Restore a stash | Stash list → right-click → Apply Stash |
| Remove a stash entry | Stash list → right-click → Delete Stash |